![]()


Artificial Intelligence as a Service
-
Origami is an AI-as-a-service that allows researchers to easily convert their deep learning models into an online service that is widely accessible to everyone without the need to setup the infrastructure, resolve the dependencies, and build a web service around the deep learning model. By lowering the barrier to entry to latest AI algorithms, we provide developers, researchers and students the ability to access any model using a simple REST API call.
-
The aim of this project is to create a framework that can help people create a web based demo out of their machine learning code and share it. Others can test the model without going into the implementation details. Usually testing models by other people involves a lot of preparation and setup. This project aims to cut that down.
This app is presently under active development and we welcome contributions. Please check out our issues thread to find things to work on, or ping us on Gitter.
Installation Instructions
Windows Installation
VirtualBox
One of the easier ways to get started with Origami on Windows is by using a virtual machine of Ubunutu 16.04 LTS on Oracle's VirtualBox. With Ubuntu installed, Origami can be installed by following the instructions in the next sections. We can install VirtualBox in just two easy steps.
Step One - Downloading Virtual Box
You can install Virtual Box on Oracle's VirtualBox website.

Next, under "Virtual binaries," click on Windows hosts under "VirtualBox X.X.XX platform packages" to download the executable file for the latest version of VirtualBox. Wait for this to install and open the file when the download has completed.
Step Two - Starting installation
The .exe file will have the following format: VirtualBox-VersionNumber-BuildNumber-Win.exe.
- Once the setup wizard is open, follow the instructions. Everything can be kept as default, but feel free to change anything to your preference.
- If you encounter a Windows User Account Control Warning pop-up, click Yes to accept and continue.
- When you reach the Network Interface dialouge box, be sure to proceed. VirtualBox will install network interfaces that will interact with the installed your virtual machine(s) and Windows. You will be temporarily disconnected from the Internet, but this connection will be re-established.
When you launch VirtualBox, you should see a screen similar to the one below. Congratualtions, you have successfully installed VirtualBox!

Setting up an Ubuntu 16.04 LTS virtual machine with VirtualBox
Origami works well on an Ubuntu 16.04 LTS virtual machine, which is what we will use when creating our virtual machine.
Disable Hyper-V
Hyper-V is a tool that provides hardware virtualization, or allows virtual machines to run on virtual hardware. While this sounds useful, it can hamper your ability to use a 64-bit version of Ubuntu for your virtual machine. To avoid issues further along the line, we will disable this feature. We need to use a 64-bit virtual machine, as this is required for Docker, which will be used to install Origami.
Note: This will disable other applications that may require Hyper-V, such as Docker for Windows. You can always switch Hyper-V back on, but you will only be able to use VirtualBox or the other application(s) at a time.
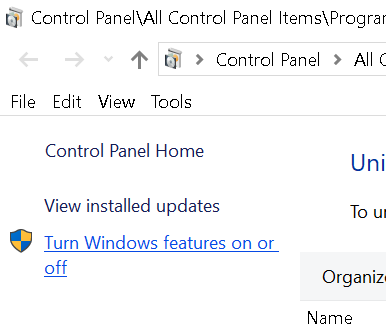
- Press Windows Key + X and select Apps and Features

- Under "Related settings," select Programs and Features

- Next, click Turn windows features on or off on the left pane
- Find Hyper-V and unmark it
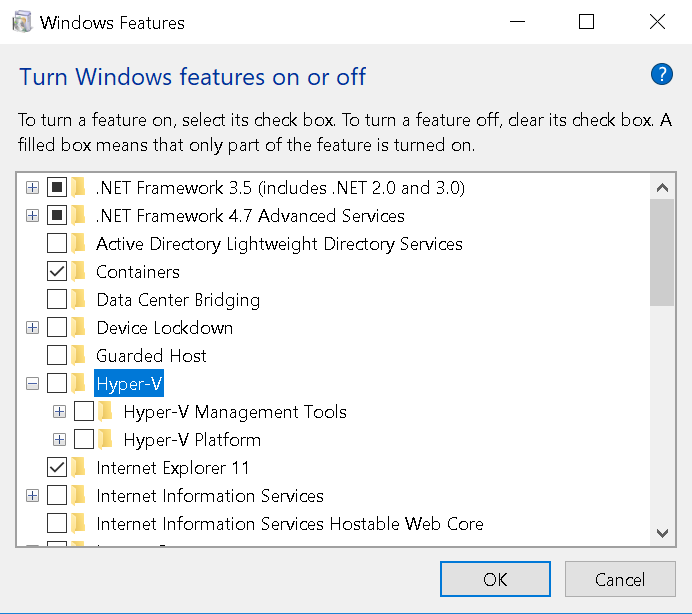
- Finally, click OK to save changes and reboot your computer
Installing Ubuntu inside Windows with VirtualBox
Although, below, we install Ubuntu 16.04 for Origami, this method can be used to install all other distributions of Ubuntu. Please be aware that you have at least a minimum of 512 MB of RAM on your computer, but keep in mind 1 or more GB is recommended.
Step One - Downloading the Ubuntu disk image (.iso file)
Navigate to this page to view the Ubuntu 16.04.5 LTS release page. Select the "64-bit PC (AMD64) desktop image" and save this for usage laters (install the 32-bit desktop image below the 64-bit option if you plan on using a 32-bit virtual machine).

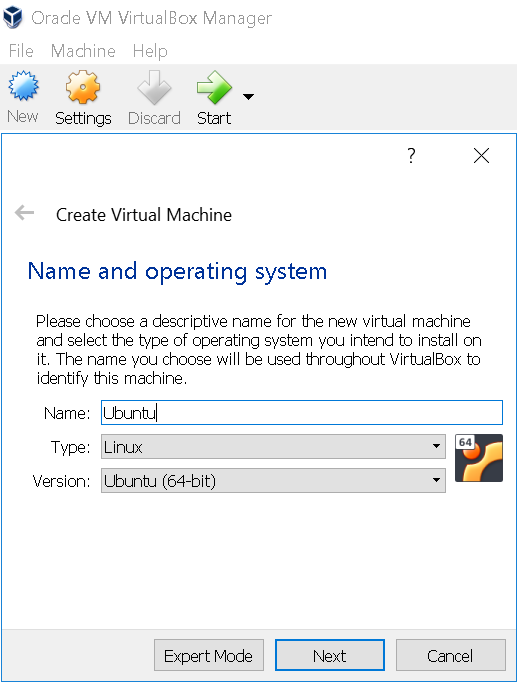
Step Two - Creating the New Virtual Machine
After installing the disk image, we will create the virtual machine on VirtualBox. Launch VirtualBox and select New to proceed. Type in "Ubuntu" into the "Name:" field of the New Virtual Machine Wizard pop-up. Conveniently, this should adjust the "Type:" and "Version:" fields automatically as needed.
Step Three - Setting Base Memory (RAM)
VirtualBox will give a recommendation of how much memory (RAM) to allocate for your virtual machine. If you do not have much RAM, especially 1 GB or less, stick with VirtualBox's recommendation. If you have ample RAM, try to stick to a quarter of your total RAM. If you do not know how much RAM you have, or as a matter of fact do not know what RAM is, stick with the recommendation.

Step Four - Hard Disk
Since this is probably your first time using VirtualBox, create a new hard disk and then click "Next."

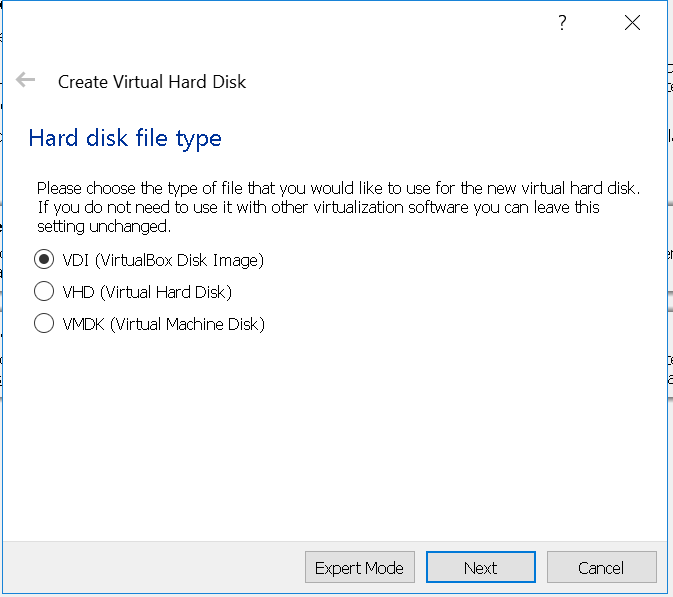
Step Five - Disk Type
Leave file type as "VDI (VirtualBox Disk Image)" and click "Next."
Step Six - Storage Details
A dynamically expanding virtual hard drive may be best, as it will only take up the space that you actually use on your virtual machine. However, there has been issues where the virtual hard drive fills up instead of actually expanding. Thus, it is recommended to pick "Fixed size."

Step Seven - Disk File Location and Hard Drive Size
Although Origami itself does not take up relatively much space, when installing Docker and other software, hard drive space can run low. Be sure to add as much hard drive space as you can, as it is a bit tedious to expand hard drive space after the virtual machine has been fully set up.

Step Eight - Create the Virtual Hard Drive
Simply click "Create" from the dialouge box from the step prior and wait for the virtual hard drive to be created. As this is usually a large file, it may take a bit of time.

Step Nine - Adding the Downloaded Ubuntu Disk Image
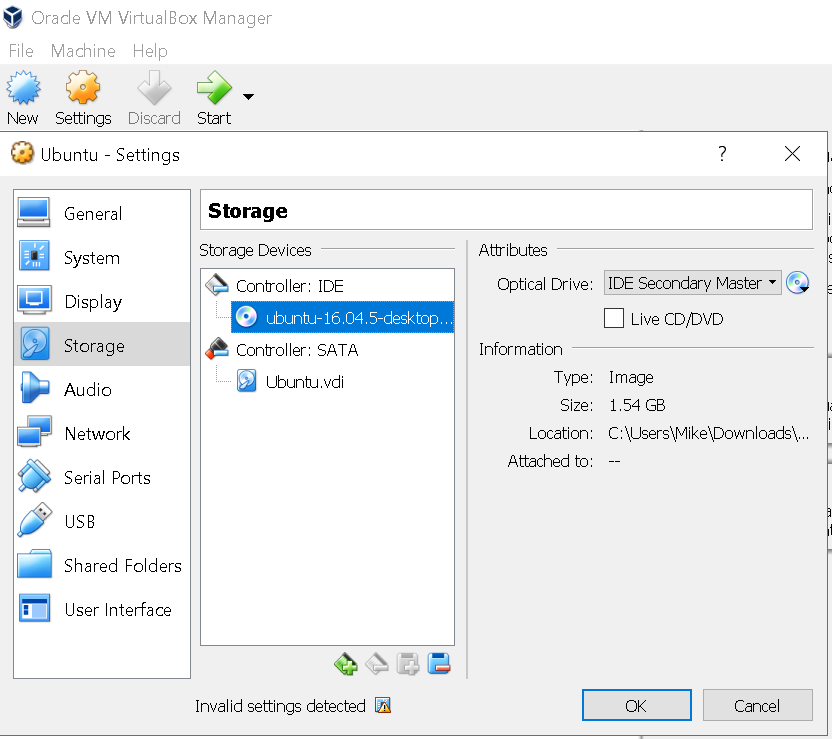
Before we boot the virtual machine, we need to add the downloaded Ubuntu disk image (.iso file) onto the virtual machine. While your virtual machine is selected in the left pane, click Settings and then Storage. Next, under "IDE Controller," select Empty and click on the little disk icon. In the menu, click Choose Virtual Optical Disk File... next to the folder icon.

Navigate to the Ubuntu disk image file downloaded earlier and click "Open."
Note: Both disk image versions for Ubuntu desktop are downloaded in the image below. As we are using a 64-bit virtual machine, we are opening the 64-bit .iso file.
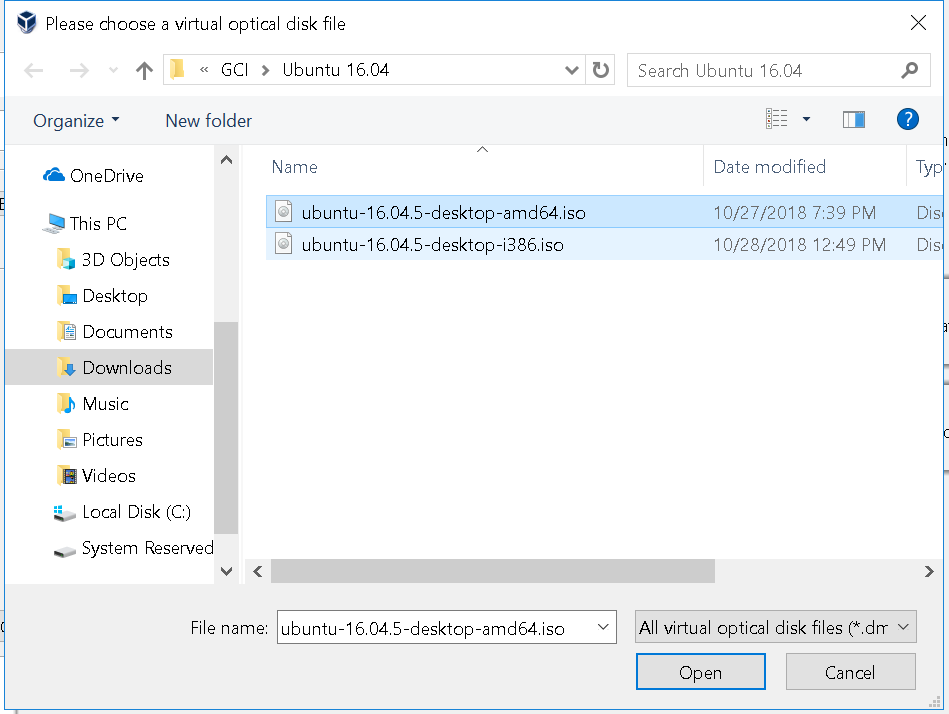
Afterward, "Empty" should now be replaced by the filename of our disk image file, and we can now click OK.
Step Ten - Downloading Ubuntu onto your virtual machine
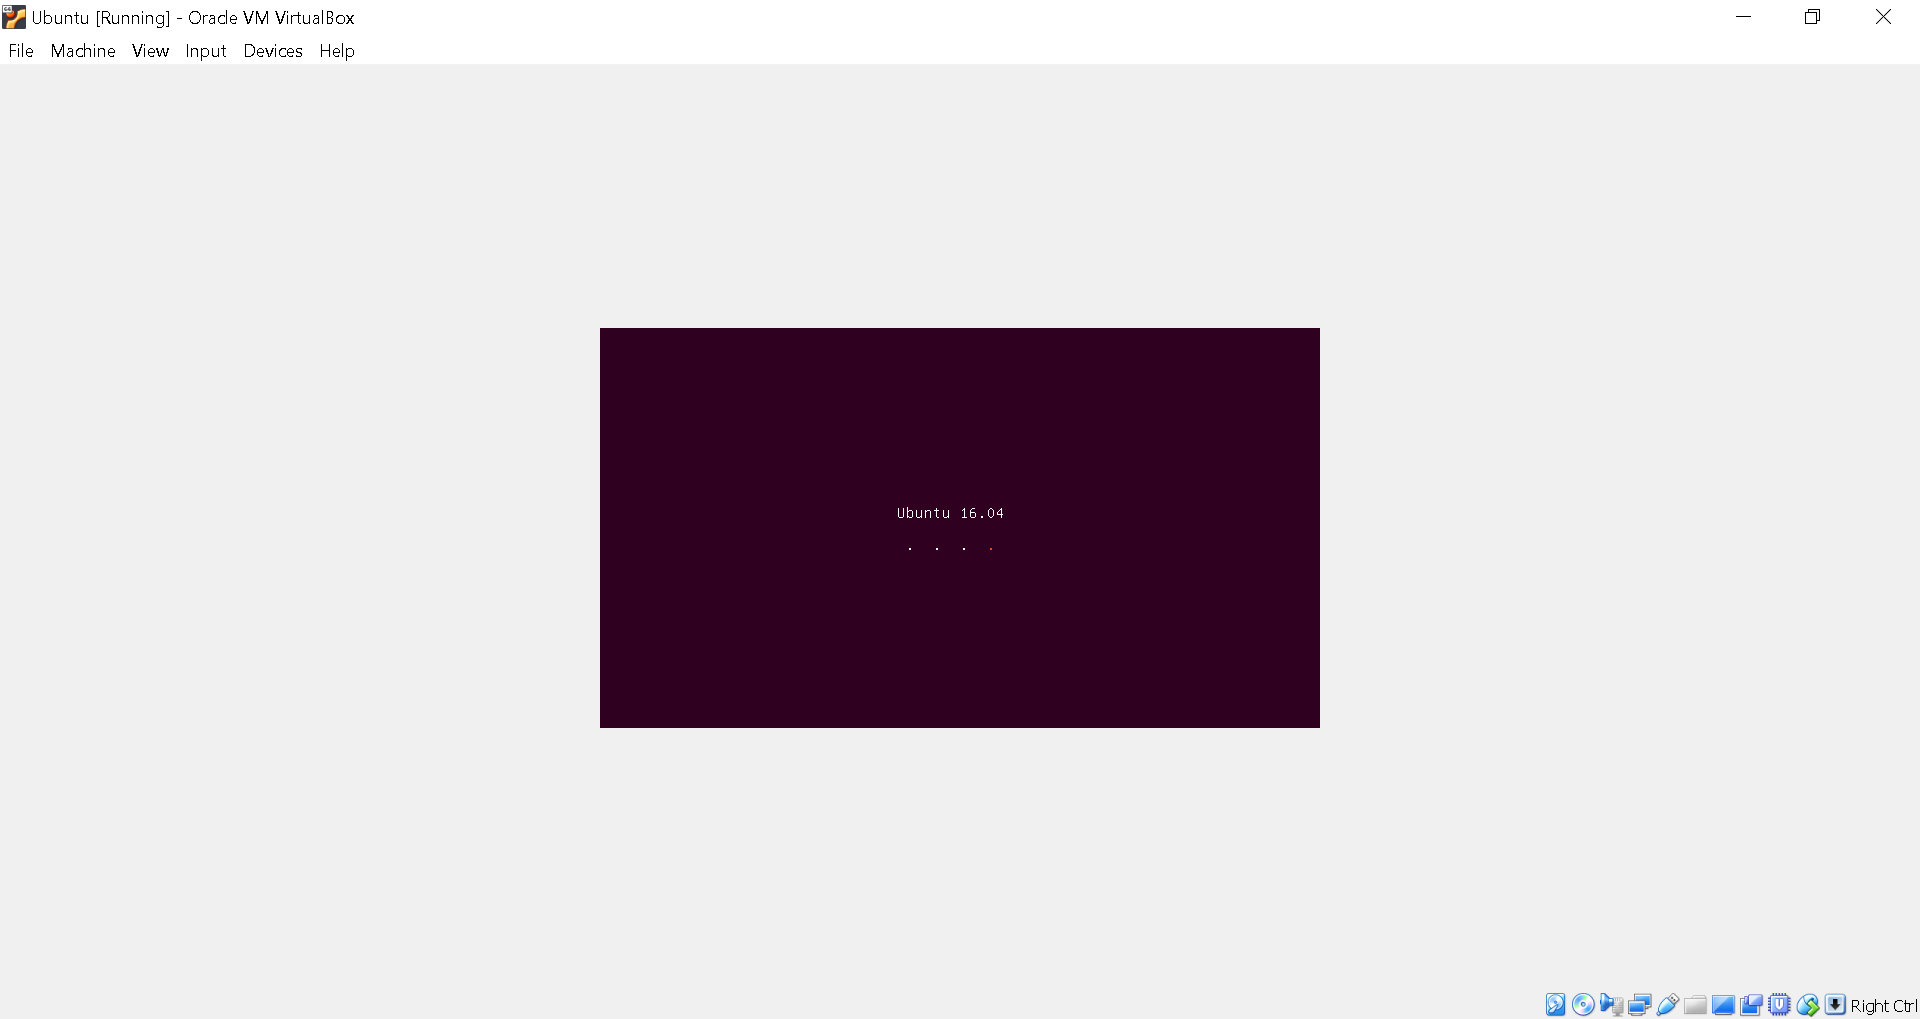
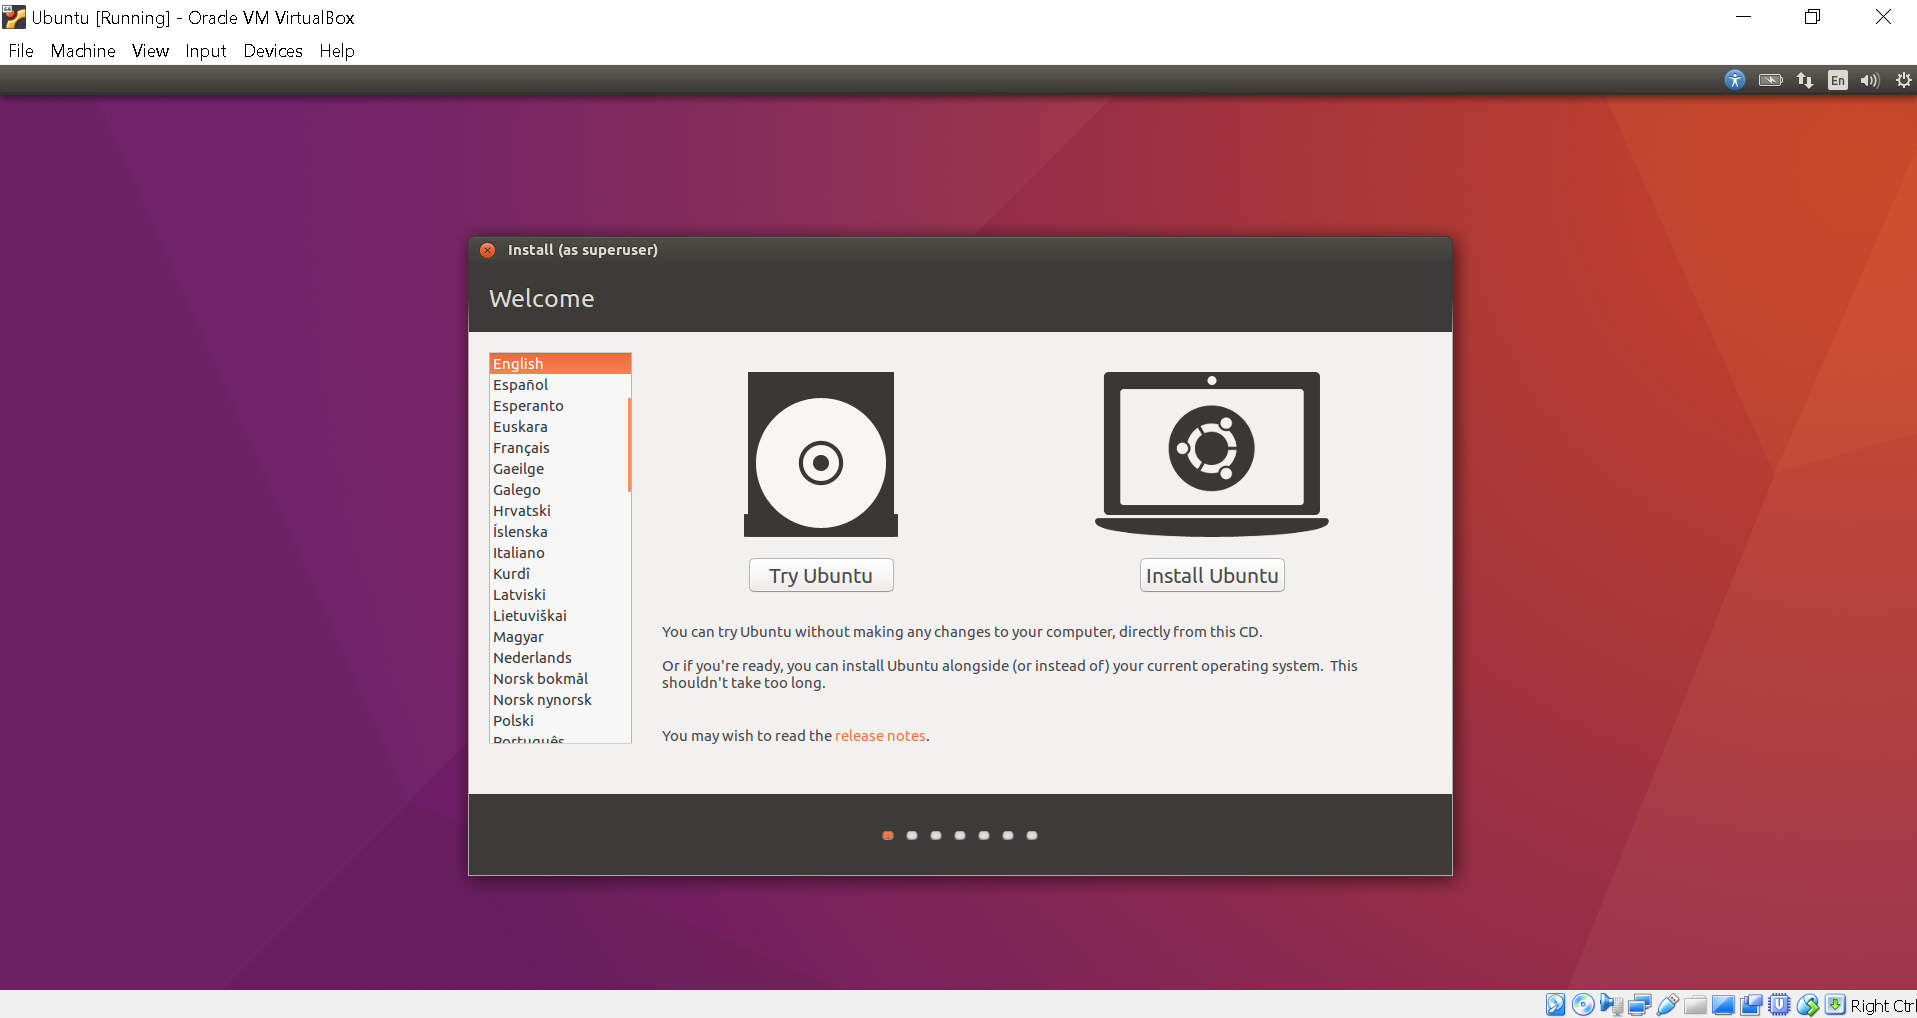
Double-click your virtual machine to start it up. You may get various pop-ups providing warnings and instructions in regard to operating a virtual machine with VirtualBox. Be sure to read these, and you can mark not to see these again if you would like. Once Ubuntu is booted up, click Install Ubuntu and follow the instructions as if you were installing Ubuntu on an actual hard drive.
Installing Docker
We use Docker to install Origami. As Origami runs well on Ubuntu, we recommend you follow the official Docker documentation here. Use the "repository method" for the installation of Docker CE on this site. CE stands for "Community Edition," as is designed for developers and ordinary users. Make sure to install the latest version of Docker (skip step #3 on "Installing Docker CE"), and if you followed the tutorial above and created an Ubuntu virtual machine, follow the x86_64 architecture command when setting up the repository.
If you are using MacOS, follow the instructions on Docker's site here.
Setting the environment variables
Refer to the below during the installation process as needed.
origami.envstores all the environment variables necessary to run Origami.
HOSTshould be set to the hostname of the server.PORTshould be set to the port you want the server to listen on.DB_NAMEwill be used to set the name for your postgres database.DB_PASSwill be used to set the password for the database user. This is also the admin password.DB_USERis the username for a user who can modify the database. This is also the admin username.DB_USER_EMAILstores the email for the admin.DB_HOSTshould be set to postgres in production and localhost in development.REDIS_HOSTshould be set to redis and localhost in development.
To create the file, cp origami.env.sample origami.env and edit the file with the above fields.
Origami/outCalls/config.jsstores config variables needed by the UI.
CLIENT_IPshould be set to the same value asHOSTinorigami.envCLIENT_PORTshould be set to the same value asPORTinorigami.env- For
DROPBOX_API_KEY, check step 3 of configuring Origami
Production setup instructions
Use Docker to setup Origami on production
Running the server
You can run the server with the help of docker and docker-compose.
Run $ docker-compose up
Development setup instructions
This application requires Pip, Node.js v5+, Yarn, and Python 2.7/3.4+ to install
Installing Pip
If you do not already have pip installed, run the following command:
$ sudo apt-get update
$ sudo apt get python-pip
MacOS: $ sudo easy_install pip
Installing Node.js
To install a stable and up-to-date version of Node.js, we will use Node's PPA (Personal Package Archive). Keep in mind this is optimal for Linux Mint and Ubuntu operating systems. Please run the following commands to install the latest version of Node.js:
$ sudo apt-get update
$ sudo apt install curl
$ curl -sL https://deb.nodesource.com/setup_10.x | sudo bash -
$ sudo apt install nodejs
$ node -v
Verify that your Node.js version is v5 or greater.
Installing Yarn
Yarn helps install dependencies and other packages with ease. Here we will use npm (Node Package Manager) to install Yarn. As npm is installed with Node.js, be sure Node is already installed. Notice in the command that we include the -g flag for installation globally, so Yarn can thus be used in all of your projects.
$ sudo apt-get update
$ sudo npm install yarn -g
Installing Python
Finally, we can install Python. Follow these commands to get the most up-to-date version of Python. If you would like a specific version of Python, be sure to include your preference after python (e.g. python 3.6 for Python 3.6). Ubuntu comes with Python installed, which is typically Python 2.7. Below, we install python3, and to use this, we would replace all python commands with python3. Below are the commands:
$ sudo apt-get update
$ sudo apt-get install python3
$ python3 --version
Create a Virtual Environment
$ pip install virtualenv$ virtualenv venvvenv = Name of virtualenv$ source venv/bin/activate
Note: Step 2 will create a folder named venv in your working directory
Getting the code and dependencies
- Clone the repository via git
$ git clone --recursive https://github.com/Cloud-CV/Origami.git && cd Origami/
- Renaming
origami.env.sampleasorigami.envand setting environment variables inorigami.env
$ cp origami.env.sample origami.env
$ nano origami.env
Here, set the environment variables according to the above instructions on environment variables. Once they have been edited, Ctrl O, Enter, and Ctrl X to save and exit. The following is an example of what this may look like (be sure to include localhost as the necessary values below if you are going to run Origami on your local machine).
set -a
HOST=localhost
PORT=8000
DB_NAME=origami546
DB_PASS=origami546
DB_USER=origami546
[email protected]
DB_HOST=localhost
REDIS_HOST=localhost
set +a
Afterward, run the following to set more variables as entailed in the above section for environment variables for Origami/outCalls/config.js
$ nano Origami/outCalls/config.js
-
Add all of the Python dependencies.
$ pip install -r requirements.txt -
Set up the Postgresql database
Install postgresql if you have not already. The -contrib package will add more utilities and added functionality.
sudo apt-get update
sudo apt-get install postgresql postgresql-contrib
Next we will create a database containing the details we will use for Origami. Following the previous example, creating the database may look like the following:
$ sudo service postgresql start
$ sudo -u postgres psql
postgres=# CREATE DATABASE origami546;
postgres=# CREATE USER origami546 WITH PASSWORD 'origami546';
postgres=# ALTER ROLE origami546 SET client_encoding TO 'utf8';
postgres=# ALTER ROLE origami546 SET default_transaction_isolation TO 'read committed';
postgres=# ALTER ROLE origami546 SET timezone TO 'UTC';
postgres=# ALTER USER origami546 CREATEDB;
postgres=# \q
-
Add all of the Javascript dependencies
$ yarn(preferably) or$ npm install -
Setup the Redis server
$ docker run -d -p 6379:6379 --name origami-redis redis:alpine
-
Activate the environment
$ source origami.env
Setting up the database
Create all the tables
$ python manage.py makemigrations
$ python manage.py migrate
Create admin account
$ python manage.py initadmin
Start the server
To ensure everything works out, follow these steps carefully. Make sure all three terminals are running at the same time.
- Start the server by
$ python manage.py runserver --noworker
- Start the worker
Open a second terminal and run the following:
$ source venv/bin/activate
$ cd Origami/
$ source origami.env
$ python manage.py runworker
- Running the server with Yarn
Open a third terminal and run the following:
$ source venv/bin/activate
$ cd Origami/
$ source origami.env
$ yarn run dev
- Go to localhost:8000 Visit Read the docs for further instructions on getting started. If you have never created an OAuth App on GitHub, see the below instructions.
Setup Authentication for Virtual Environment
-
Go to Github Developer Applications and create a new application here.
-
For local deployments, use the following information:
- Application name: Origami
- Homepage URL: http://localhost:8000
- Application description: Origami
- Authorization callback URL: http://localhost:8000/auth/github/login/callback/
-
Github will provide you with a client ID and secret Key, save these.
-
Start the application.
$ python manage.py runserver
-
Login with the credentials from your admin account. This should be your username and password you used for the Postgresql if everything was kept consistent.
-
From the Django admin home page, go to
Sitesunder theSitescategory and make sure "localhost:8000" is the only site listed under "DOMAIN NAME".
Contributing to Origami
-
Make sure you run tests on your changes before you push the code using:
$ python manage.py test$ yarn run test
-
Fix lint issues with the code using:
$ yarn run lint:fix
License
This software is licensed under GNU AGPLv3. Please see the included License file. All external libraries, if modified, will be mentioned below explicitly.


