A simple security system to run on a Raspberry Pi.
Features:
- Motion detection and photo capture using the camera
- Mobile notifications with photos
- Detects when you are home and arms or disarms automatically
- Can be remotely controlled using Telegram
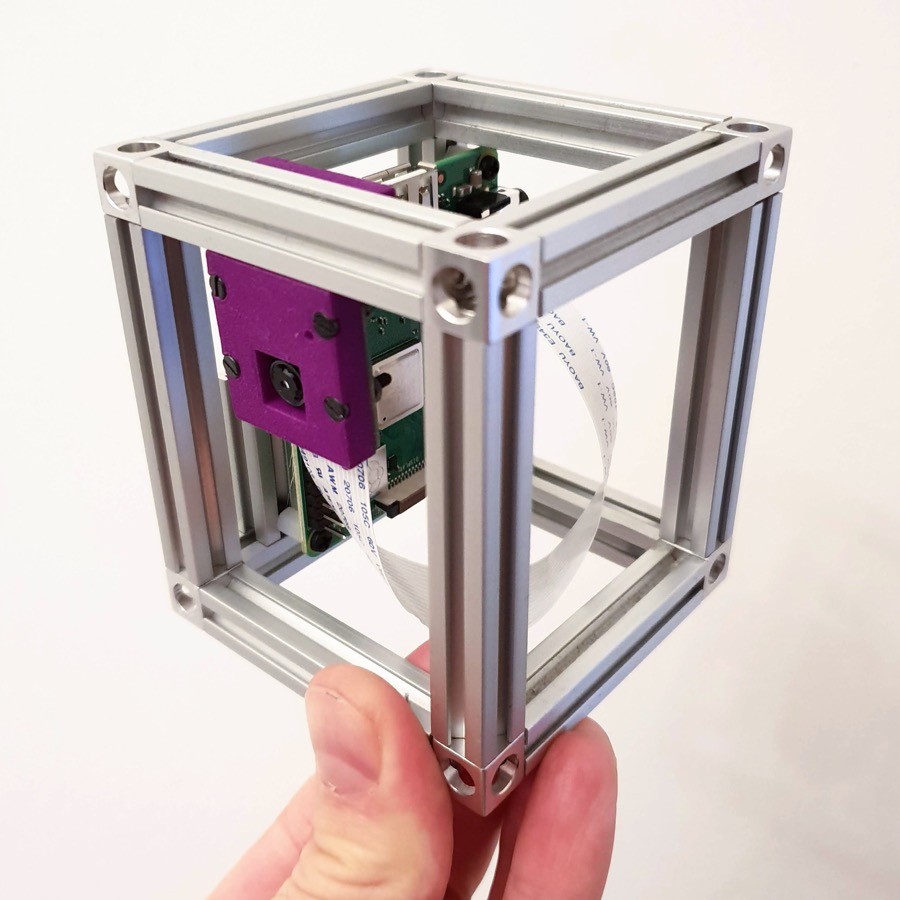
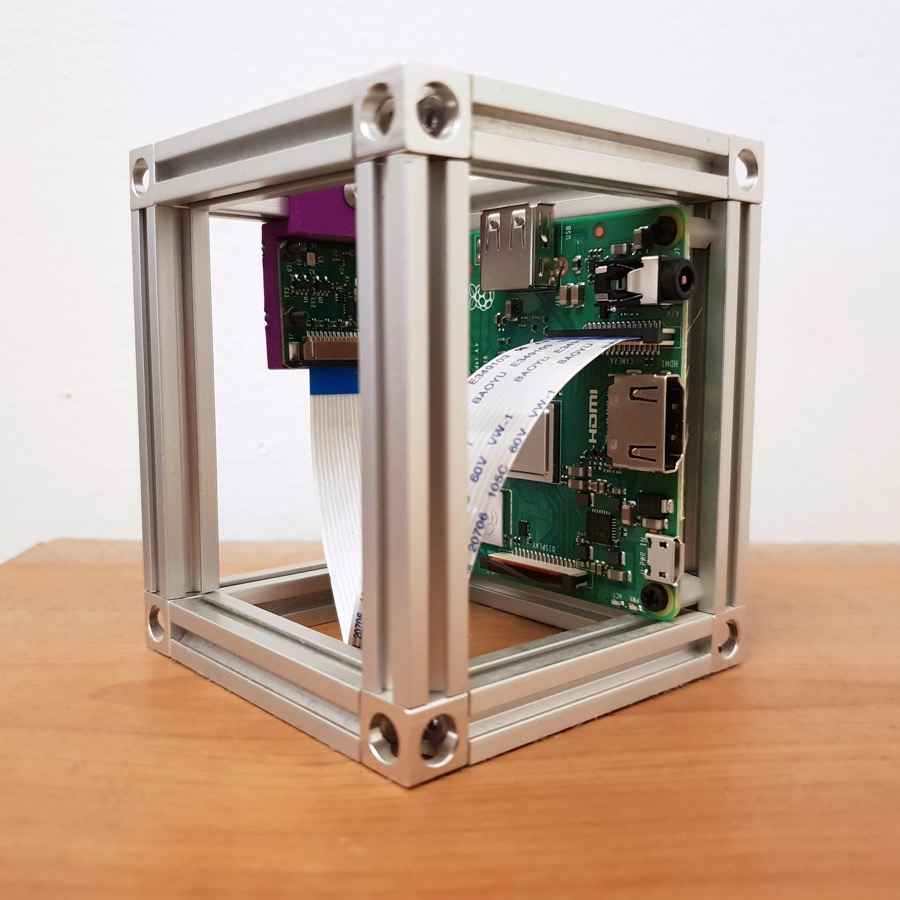
You will need this hardware:
- Raspberry Pi with camera interface.
- Raspberry Pi camera module.
- A Wi-Fi adapter that supports monitor mode (see note)
Software requirements:
- A Telegram bot. It's free and easy to setup.
- Raspbian Stretch Lite distribution installed.
- Python 3.
One of my main goals was to have the system completely automatic. I didn't want to have to arm or disarm it when leaving or arriving home. I figured the easiest way to achieve this was to try and detect the mobile phones of the home occupants. Conceptually this was quite simple but in practice it was the most challenging part because:
- Capturing all packets on a Wi-Fi interface is too resource intensive.
- Mobile phones are not always online and sending packets over Wi-Fi. Sometimes they stay unconnected for 15 minutes or longer.
- Even with 99% accuracy, false alarms are annoying.
After much testing I used an approach that mixes active (ARP ping) and passive (packet capture) detection over the Wi-Fi adapter based on knowing the MAC addresses of the mobile phones. The mobile phone MAC addresses are set in the configuration and rpi-security captures packets on a monitor mode interface with the following filter:
- Wi-Fi probe requests from any of the configured MACs.
- Any packets sent from the configured MACs to the host running rpi-security.
The application resets a counter when packets are detected and if the counter goes longer than ~10 minutes the system is armed. To eliminate the many false alarms, when transitioning between an armed/disarmed state, the application performs an ARP scan directed at each of the configured MAC addresses to be sure they are definitely online or offline. Both iOS and Android will respond to this ARP scan 99% of the time where a ICMP ping is quite unreliable. By combining the capture of Wi-Fi probe requests and using ARP scanning, the Wi-Fi frequency doesn't matter because mobile phones send probe requests on both frequencies and ARP scan works across both frequencies too.
Motion detection is done using OpenCV. Each motion detection will save 4 pictures in /tmp:
- frame.jpg: The picture with rectangles surrounding the motion
- gray.jpg: The picture with grayscale and blur (which will be use to detect motion between the current frame and the previous one)
- abs_diff.jpg: The absolute difference between they grays frames (current and previous)
- thresh.jpg: A threshold has been applied to be sure the motion is important enough to be detected.
A Telegram bot is used to send notifications with the captured images. They have good mobile applications and a nice API. You can also view the messages in a browser and messages are synced across devices. If the system is in an armed state and motion is detected then a message with the captured image is sent to you from the Telegram bot. Notifications are also sent on any alarm state change.
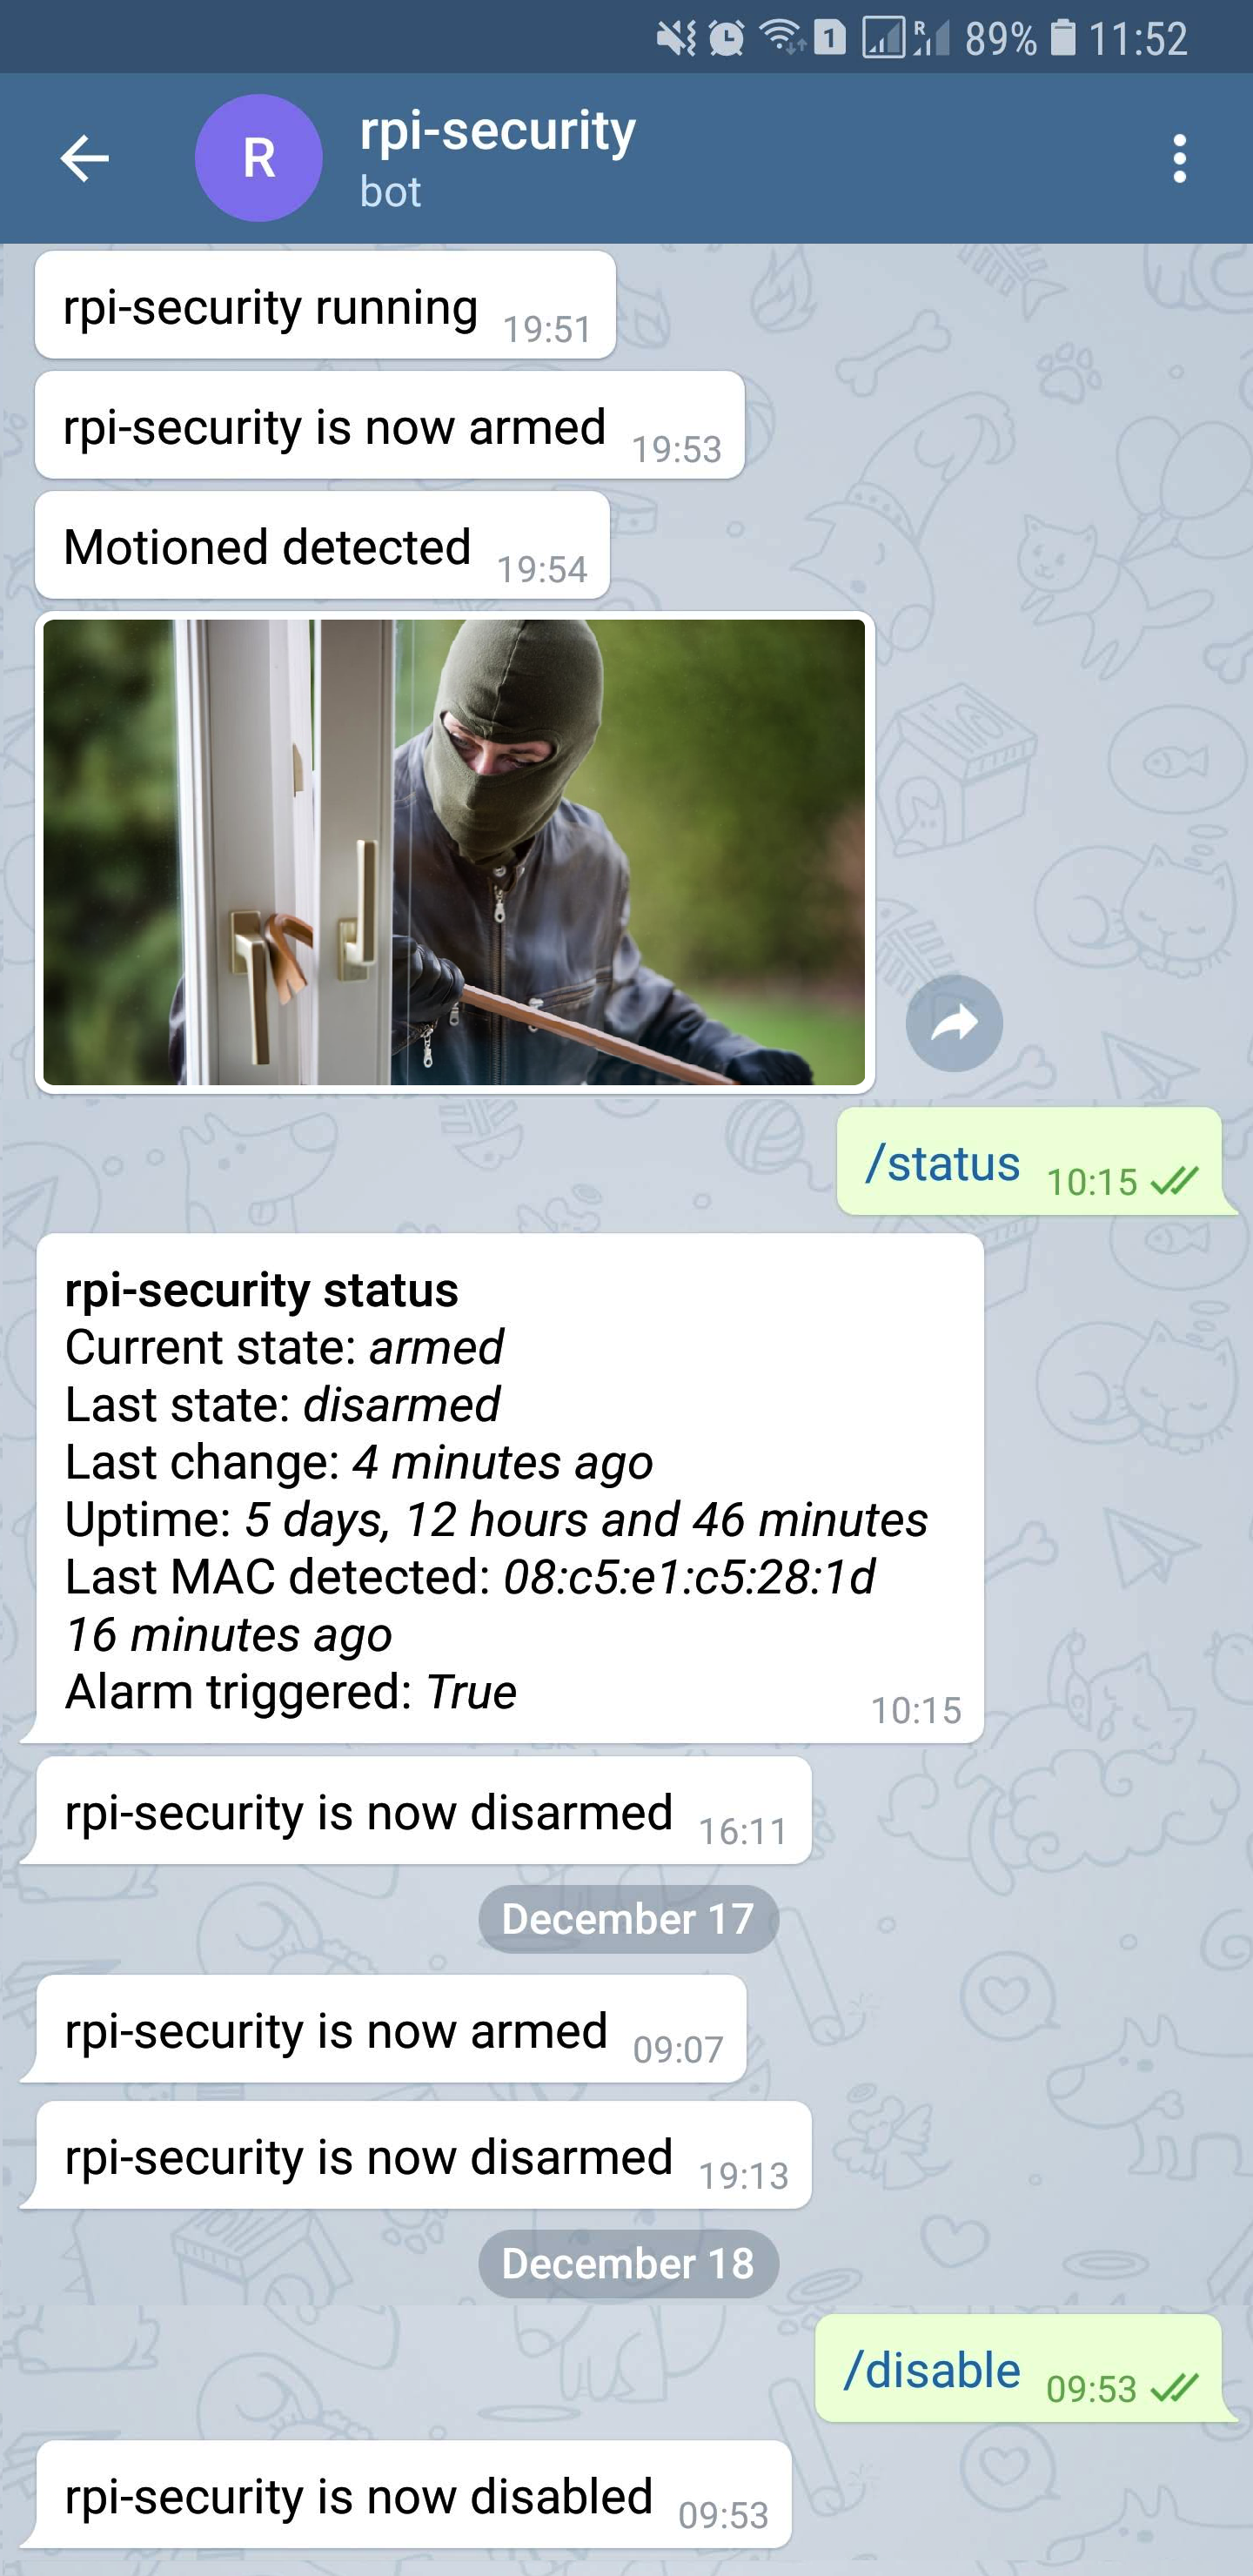
You can send the Telegram bot commands that trigger certain actions.
- /disable: Disables the service until re-enabled.
- /enable: Enables the service after it being disabled.
- /status: Sends a status report.
- /photo: Captures and sends a photo.
- /gif: Captures and sends a gif.
The application is written in python 3 and large parts of the functionality are provided by the following pip packages:
The application uses multithreading in order to process events asynchronously. There are 4 threads:
- telegram_bot: Responds to commands.
- monitor_alarm_state: Arms and disarms the system.
- capture_packets: Captures packets from the mobile devices.
- process_photos: Sends captured images via Telegram messages.
First ensure your WiFi is set up correctly
Ensure your GPU/memory split gives 128MB to the GPU. You can see or set this value with raspi-config.
Install required packages for python:
sudo apt update
sudo apt install -y tcpdump iw python3-dev python3-pip python3-numpy
Install required packages for OpenCV:
sudo apt install -y libhdf5-103 libharfbuzz0b libwebp6 libjasper1 libopenexr23 libgstreamer1.0-0 libatlas-base-dev libgtk-3-0 libqtgui4 libqt4-test libilmbase23 libavcodec-extra58 libavformat58 libswscale5 libjpeg8-dev zlib1g-dev libffi-dev libopenjp2-7-dev libtiff5Install OpenCV and rpi-security:
sudo pip3 install opencv-contrib-python==3.4.6.27 opencv-contrib-python-headless==3.4.6.27
sudo pip3 install --no-binary :all: https://github.com/FutureSharks/rpi-security/archive/1.5.zip
Reload systemd configuration and enable the service:
sudo systemctl daemon-reload
sudo systemctl enable rpi-security.service
Add your MAC address or addresses, Telegram bot API key and any other changes to /etc/rpi-security.conf.
Ensure you have enabled the camera module using raspi-config.
And start the service:
sudo systemctl start rpi-security.serviceYou need to send at least one message to the Telegram bot otherwise it won't be able to send you messages. This is so the service can save the telegram chat_id. So just send the /status command.
It runs as a service and logs to syslog. To see the logs check /var/log/syslog.
You can start rpi-security.py manually with debug output. First add the monitor mode interface:
root@raspberrypi:~# iw phy phy1 interface add mon0 type monitor
root@raspberrypi:~# ifconfig mon0 up
Then start with debug output:
root@raspberrypi:~# rpi-security.py -d
2016-05-28 14:43:30 DEBUG   rpi-security.py:73  MainThread          State file read: /var/lib/rpi-security/state.yaml
2016-05-28 14:43:30 DEBUG   rpi-security.py:44  MainThread          Calculated network: 192.168.178.0/24
2016-05-28 14:43:41 INFO    rpi-security.py:214 monitor_alarm_state thread running
2016-05-28 14:43:41 INFO    rpi-security.py:196 capture_packets     thread running
2016-05-28 14:43:41 INFO    rpi-security.py:259 telegram_bot        thread running
2016-05-28 14:43:41 INFO    rpi-security.py:154 process_photos      thread running
2016-05-28 14:43:43 INFO    rpi-security.py:392 MainThread          rpi-security running
2016-05-28 14:43:43 INFO    rpi-security.py:112 MainThread          Telegram message Sent: "rpi-security running"
2016-05-28 14:44:29 DEBUG   rpi-security.py:191 capture_packets     Packet detected from aa:aa:aa:bb:bb:bb
2016-05-28 14:44:29 DEBUG   rpi-security.py:191 capture_packets     Packet detected from aa:aa:aa:bb:bb:bb
2016-05-28 14:44:48 DEBUG   rpi-security.py:280 Dummy-1             Motion detected but current_state is: disarmed
And then delete the interface when complete:
iw dev mon0 delYour WiFi adapter must support monitor mode. The Raspberry Pi built-in wireless LAN adapters do not currently support monitor mode by default. Currently the only way to get monitor mode working for the built-in WiFi adapters is to use nexmon and this is not simple.
The easiest way to get a monitor mode WiFi adapter is to just buy a USB adapter that supports it. Currently the best options are:
- RT5370: very cheap, easy to find but only supports 2.4Ghz
- RT3572: more expensive, hard to find but supports both 2.4Ghz and 5Ghz
Most modern phones and routers use 5Ghz now so results could be unreliable if your adapter only supports 2.4Ghz.
The interface used to connect to your WiFi network must be the same interface that supports monitor mode. And this must be the same WiFi network that the mobile phones connect to. This is because there is a packet capture running to listen for mobile phone ARP replies and Wi-Fi probe requests.
The default configuration of this application assumes you are using a USB adapter as phy#1/mon0/wlan1.
If you are not using the on-board WiFi adapter then you can stop it connecting to your WiFi network by running this command:
echo -e "interface wlan0\nnohook wpa_supplicant" >> /etc/dhcpcd.confThis shows a working WiFi adapter arrangement:
root@raspberrypi:~ # iw dev
phy#1
	Interface mon0
		ifindex 4
		wdev 0x100000002
		addr 00:0e:8e:58:d6:af
		type monitor
		txpower 26.00 dBm
	Interface wlan1
		ifindex 3
		wdev 0x100000001
		addr 00:0e:8e:58:d6:af
		ssid Connecting...
		type managed
		channel 124 (5620 MHz), width: 40 MHz, center1: 5630 MHz
		txpower 26.00 dBm
phy#0
	Interface wlan0
		ifindex 2
		wdev 0x1
		addr b8:27:eb:cb:b6:5d
		type managed
		channel 34 (5170 MHz), width: 20 MHz, center1: 5170 MHz
		txpower 31.00 dBm
You could have interfaces with different names, just be sure to change the parameters in /etc/rpi-security-environment.
Currently the camera is used for motion detection. If you want to use the old version with support for a PIR sensor then look at version 0.7
About once every month or two my Raspberry Pi loses the WLAN connection. I created a cron job to check connectivity and reboot if the check fails.
wget https://raw.githubusercontent.com/FutureSharks/rpi-security/master/bin/check-telegram-connectivity.sh -O /usr/local/bin/check-telegram-connectivity.sh
chmod 0755 /usr/local/bin/check-telegram-connectivity.sh
echo '*/20 * * * * root /usr/local/bin/check-telegram-connectivity.sh' > /etc/cron.d/reboot-on-connection-failure