fastapi-cloudauth standardizes and simplifies the integration between FastAPI and cloud authentication services (AWS Cognito, Auth0, Firebase Authentication).
- Verify access/id token: standard JWT validation (signature, expiration), token audience claims, etc.
- Verify permissions based on scope (or groups) within access token and extract user info
- Get the detail of login user info (name, email, etc.) within ID token
- Dependency injection for verification/getting user, powered by FastAPI
- Support for:
- AWS Cognito
- Auth0
- Firebase Auth (Only ID token)
Python 3.6+
$ pip install fastapi-cloudauth- Check
region,userPoolIDandAppClientIDof AWS Cognito that you manage to - Create a user's assigned
read:userspermission in AWS Cognito - Get Access/ID token for the created user
NOTE: access token is valid for verification, scope-based authentication, and getting user info (optional). ID token is valid for verification and getting full user info from claims.
Create a main.py file with the following content:
import os
from pydantic import BaseModel
from fastapi import FastAPI, Depends
from fastapi_cloudauth.cognito import Cognito, CognitoCurrentUser, CognitoClaims

app = FastAPI()
auth = Cognito(
    region=os.environ["REGION"],
    userPoolId=os.environ["USERPOOLID"],
    client_id=os.environ["APPCLIENTID"]
)

@app.get("/", dependencies=[Depends(auth.scope(["read:users"]))])
def secure():
    # access token is valid
    return "Hello"


class AccessUser(BaseModel):
    sub: str


@app.get("/access/")
def secure_access(current_user: AccessUser = Depends(auth.claim(AccessUser))):
    # access token is valid and getting user info from access token
    return f"Hello", {current_user.sub}


get_current_user = CognitoCurrentUser(
    region=os.environ["REGION"],
    userPoolId=os.environ["USERPOOLID"],
    client_id=os.environ["APPCLIENTID"]
)


@app.get("/user/")
def secure_user(current_user: CognitoClaims = Depends(get_current_user)):
    # ID token is valid and getting user info from ID token
    return f"Hello, {current_user.username}"
Run the server with:
$ uvicorn main:app

INFO:     Started server process [15332]
INFO:     Waiting for application startup.
INFO:     Application startup complete.
INFO: Uvicorn running on http://127.0.0.1:8000 (Press CTRL+C to quit)Go to http://127.0.0.1:8000/docs.
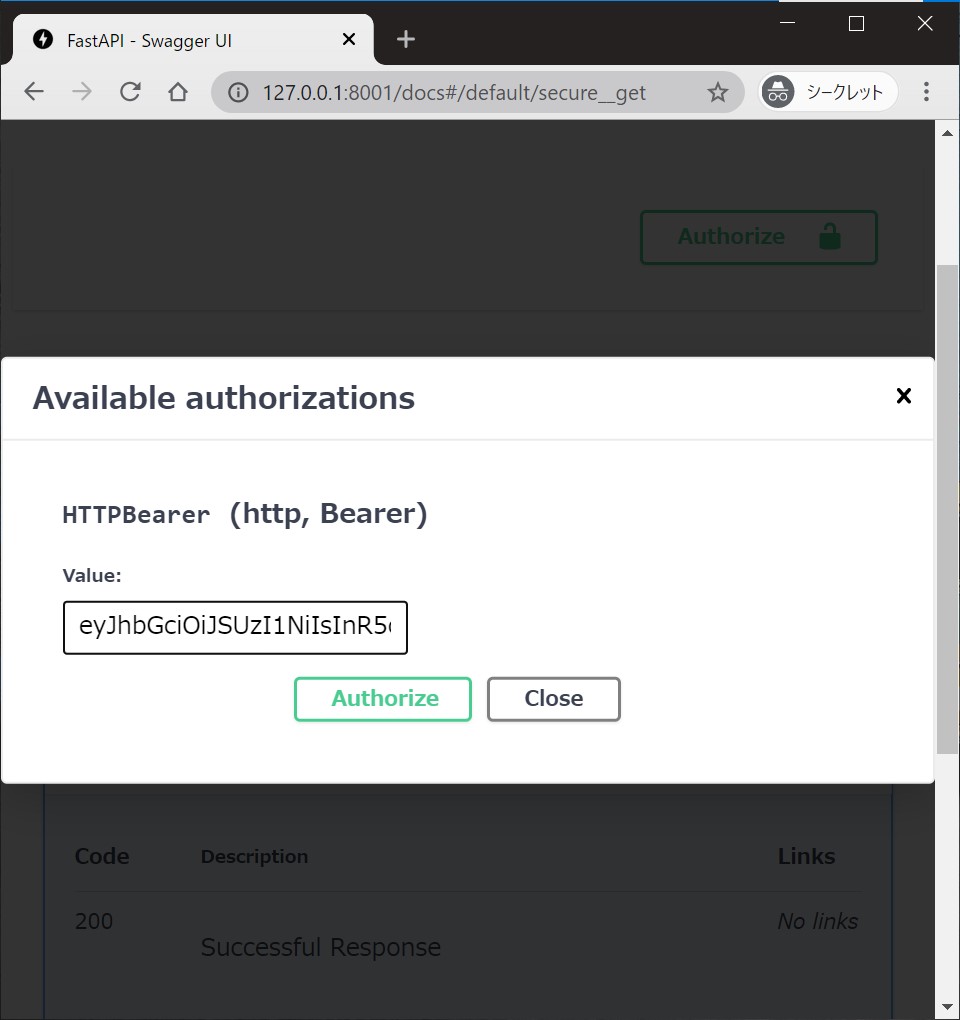
You will see the automatic interactive API documentation (provided by Swagger UI).
Authorize 🔓 button can be available at the endpoint's injected dependency.
You can supply a token and try the endpoint interactively.
- Check
domain,customAPI(Audience) andClientIDof Auth0 that you manage to - Create a user assigned
read:userspermission in Auth0 - Get Access/ID token for the created user
Create a file main.py with:
import os
from pydantic import BaseModel
from fastapi import FastAPI, Depends
from fastapi_cloudauth.auth0 import Auth0, Auth0CurrentUser, Auth0Claims

app = FastAPI()

auth = Auth0(domain=os.environ["DOMAIN"], customAPI=os.environ["CUSTOMAPI"])


@app.get("/", dependencies=[Depends(auth.scope(["read:users"]))])
def secure():
    # access token is valid
    return "Hello"


class AccessUser(BaseModel):
    sub: str


@app.get("/access/")
def secure_access(current_user: AccessUser = Depends(auth.claim(AccessUser))):
    # access token is valid and getting user info from access token
    return f"Hello", {current_user.sub}


get_current_user = Auth0CurrentUser(
    domain=os.environ["DOMAIN"],
    client_id=os.environ["CLIENTID"]
)


@app.get("/user/")
def secure_user(current_user: Auth0Claims = Depends(get_current_user)):
    # ID token is valid and getting user info from ID token
    return f"Hello, {current_user.username}"
Try to run the server and see interactive UI in the same way.
- Create a user in Firebase Authentication and get
project ID - Get ID token for the created user
Create a file main.py with:
from fastapi import FastAPI, Depends
from fastapi_cloudauth.firebase import FirebaseCurrentUser, FirebaseClaims

app = FastAPI()

get_current_user = FirebaseCurrentUser(
    project_id=os.environ["PROJECT_ID"]
)


@app.get("/user/")
def secure_user(current_user: FirebaseClaims = Depends(get_current_user)):
    # ID token is valid and getting user info from ID token
    return f"Hello, {current_user.user_id}"
Try to run the server and see the interactive UI in the same way.
We can get values for the current user from access/ID token by writing a few lines.
For Auth0, the ID token contains the following extra values (Ref at Auth0 official doc):
{
  "iss": "http://YOUR_DOMAIN/",
  "sub": "auth0|123456",
  "aud": "YOUR_CLIENT_ID",
  "exp": 1311281970,
  "iat": 1311280970,
  "name": "Jane Doe",
  "given_name": "Jane",
  "family_name": "Doe",
  "gender": "female",
  "birthdate": "0000-10-31",
  "email": "[email protected]",
  "picture": "http://example.com/janedoe/me.jpg"
}
By default, Auth0CurrentUser gives pydantic.BaseModel object, which has username (name) and email fields.
Here is sample code for extracting extra user information (adding user_id) from ID token:
from pydantic import Field
from fastapi_cloudauth.auth0 import Auth0Claims  # base current user info model (inheriting `pydantic`).

# extend current user info model by `pydantic`.
class CustomAuth0Claims(Auth0Claims):
    user_id: str = Field(alias="sub")

get_current_user = Auth0CurrentUser(domain=DOMAIN, client_id=CLIENTID)
get_current_user.user_info = CustomAuth0Claims  # override user info model with a custom one.
Or, we can set new custom claims as follows:
get_user_detail = get_current_user.claim(CustomAuth0Claims)

@app.get("/new/")
async def detail(user: CustomAuth0Claims = Depends(get_user_detail)):
return f"Hello, {user.user_id}"If you don't require pydantic data serialization (validation), FastAPI-CloudAuth has an option to extract the raw payload.
All you need is:
get_raw_info = get_current_user.claim(None)

@app.get("/new/")
async def raw_detail(user = Depends(get_raw_info)):
    # user has all items (ex. iss, sub, aud, exp, ... it depends on passed token)
return f"Hello, {user.get('sub')}"Advanced user-SCOPE verification to protect your API.
Supports:
- all (default): required all scopes you set
- any: At least one of the configured scopes is required
Use as (auth is this instanse and app is fastapi.FastAPI instanse):
from fastapi import Depends
from fastapi_cloudauth import Operator

@app.get("/", dependencies=[Depends(auth.scope(["allowned", "scopes"]))])
def api_all_scope():
    return "user has 'allowned' and 'scopes' scopes"

@app.get("/", dependencies=[Depends(auth.scope(["allowned", "scopes"], op=Operator._any))])
def api_any_scope():
return "user has at least one of scopes (allowned, scopes)"Please read CONTRIBUTING for how to set up the development environment and testing.


